Following on from the Chemtrails – Silent Killers blog…..
After the blue sky was turned hazy by the chemtrails, we decided to do something about it and build our own Chembuster. We sourced the parts over 1-2 months to break up the cost – we’ll tell you how much at the end.Thanks to Ken Adachi at www.educate-yourself.org/ct/goodbyects10jan02.shtml for an interesting article and description how to build the Chembuster.
One problem we ran into was all the sites we were reading had measurements in American imperial (inches and feet) – the UK being what it is, had everything in metric.
We’ll run through the parts required and then a brief description how it all went together.
Parts
- 5 x Copper Tubes – 28mm by 3m
- 6 x 28mm copper couplers
- 6 x 28mm copper end caps
- 6 x Clear quartz crystals – double terminated – about 2 ½ inches in length and 0.75 inches in width
- Exterior plywood
- Two-gallon bucket
- Aluminium shavings – about 1.5 gallons
- Polyester Resin – about 7.5kg (works out to be 5kg per gallon) – make sure you mix it with the catalyst in a well ventilated area.
- Small piece of hosepipe
Tools
- 28mm drill bit for making circular holes
- 32mm drill bit for making circular holes
- Pipe cutter
- Compass
How It Went Together
The bucket
We had great trouble trying to find a 2 gallon bucket with straight sides – we ended up going to a Home Brew shop and got the perfect size.
Copper tubes
3 tubes were cut in half to 1.5metres, a single tube was cut into 30cm lengths – the last tube was left until the end – these were from Screwfix.com.
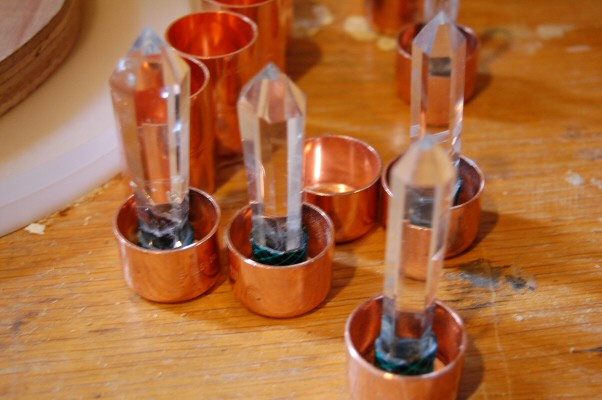
Crystals
We had trouble getting six crystals – in the UK, they were very expensive and managed to buy 10 crystals from overseas – they were double terminated. The correct way to position the crystals was with the positive end pointing up – this was the clear end. The cloudy end (or negative was placed at the bottom). If you have trouble deciding which is which, go for single terminated crystals.
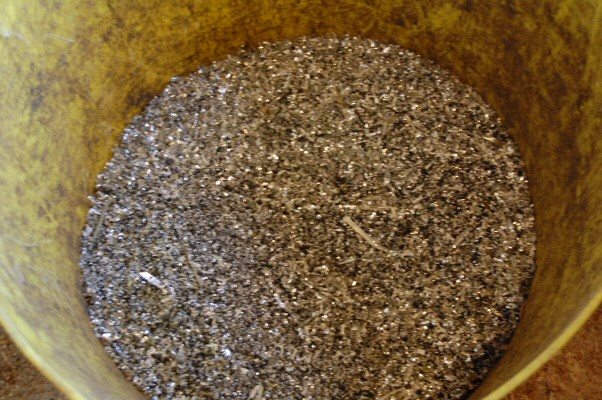
Aluminium shavings
We went to a PVC windows manufacturer and they put aside some for us.
Plywood
We got exterior plywood from a local DIY store. You need to cut three pieces of wood:
- The first should be about an 8 inch circle, using a compass – about ½ inch smaller than the base of the bucket. Draw a line through the centre across the diameter. Then repeat about 2 ½ inches apart (from the edge) until you have 3 intersecting lines. Mark 2 ½ inches from the centre and place a mark – this is where you will drill the hole. Repeat until you have six marks.
- The second will fit into the top of the bucket to keep the pipes straight while the resin sets so draw a 9 inch circle or one larger for your bucket.
- The third one should be 8 inches in diameter.

Construction
- Cut out the circles using a jigsaw.
- Now drill a hole through the centre of each circle and put them under each other (the first one on top), placing a nail through the centre into a piece of wood and clamp them. Drill a hole where you drew the lines on the 2 ½ inch circle – make sure you go through all layers. This is so they all line up when its constructed.
- You can now separate them. For the first circle, this will be the top so using your 28mm drill bit, drill holes in the six holes and one in the middle.
- For the second, drill again using the 28mm drill bit – do not drill one in the middle – its not required. Also cut off a straight line on two sides of the circle – this will allow you to remove the wood when its not required.
- For the third, drill 32mm holes in the six holes and in the middle.
- Cut a small piece of hose pipe and push over the bottom of the crystal and now glue into the end cap – repeat for all six. When dry, gently push the 30cm lengths of copper tube into the end cap and seal with tape to prevent resin leaking in.
- You’re now ready to assemble!
- Note: We mixed 2 litres of resin with 2 teaspoons of catalyst – this gave a curing time of about 1 ½ hours and would mix together with 5 handfuls of shavings.
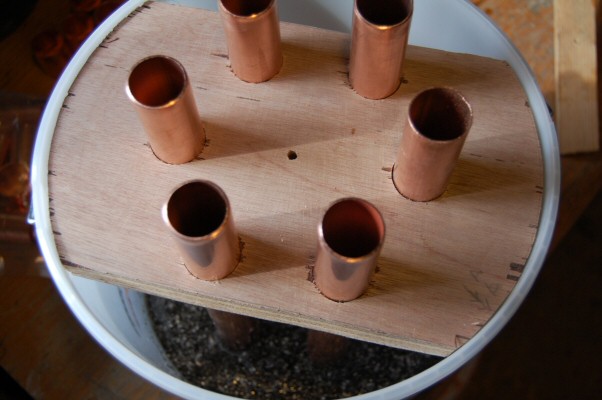
- Place 2 handfuls of the shavings in the bucket and cover with about 1 inch of catalysed resin. Push the third circle onto the resin mix so it just laps over the edges. Place the 30cm pipes with end caps into the holes and put some more resin and more shavings in. Mix together with a wooden stick.
- Place the second circle over the top and leave to set. Drying time depends on how much catalyst you mixed with the resin and the manufacturers recommendation.
- When dry, remove the second circle – this can be used when you build one for your friends!
- Now add about 2 inches of resin and stir in more shavings – we only added 2 inches as the resin when curing generates a lot of heat and could distort the bucket. We made ours using 3 to 4 layers of resin, and left to cure between each one.
- Repeat again when dry until you have no more resin and it should be up to the 8 litre mark on the bucket. On the final pour, we placed 4 citrine crystals and 4 rose quartz crystals (for love) – these were pushed into the resin mixture but you can place any crystals you are drawn to – you can also add herbs.
- So 7.5kg of resin and 5 litres of shavings made 8 litres of orgone.
- We left ours overnight to completely harden.
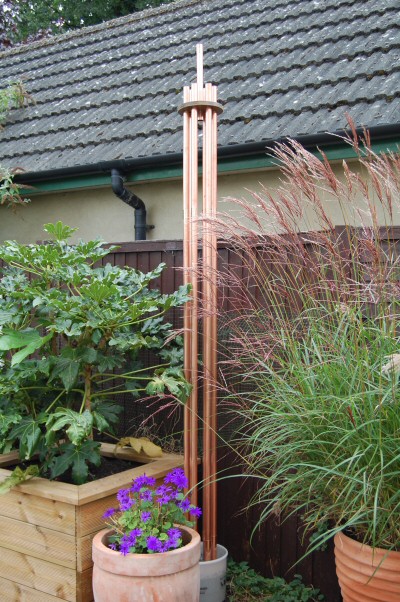
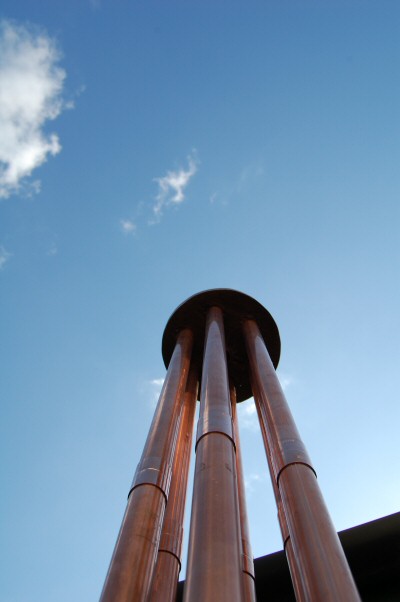
- Using the couplers, we added the 1.5m tubes to the tubes buried in the resin. So we could extend the Chembuster even further, we measured the remaining copper and cut it up – we had an extra 23 inches on each of the six tubes. We added the third circle to the top and pushed it down – this makes the chembuster rigid. We also added a spare piece of copper pipe to the centre hole so we could push a piece of plastic over the top to prevent water freezing in the pipes and shattering the crystals.
- And there you have it. We’ve left ours in the bucket at the moment but plan to bury it in the garden up to the top of the resin. It takes about 2 weeks for your chembuster to fully charge itself.
How does it work?
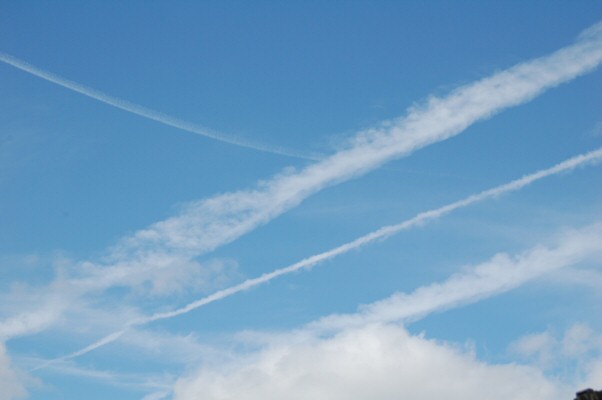
No idea – from what we’ve seen and read, it just works. Normal contrails last anywhere up to 15 minutes where as chemtrails last for several hours and it becomes very windy after spraying. Today, we had chemtrails in the sky and they disappeared almost immediately and thats with the Chembuster charging for only a week!
What sort of radius is affected by the chembuster?
We’ve read between 25 and 60 miles radius for a six foot Chembuster – ours is 2 inches short of 8 feet so we roughly expect it to reach around 125 miles in each direction from the Chembuster.
Are there any dangers?
None, but you have to remember that the Chembuster is a conductor of ‘good’ orgone energy so we recommend that if you touch the charged copper pipes, you should touch the resin base. To be safe, keep away from children and pets. However we recommend you conduct your own research into this.
Is there a disclaimer?
Yep – we cannot be held responsible for any problems or injuries you have while constructing or using the Chembuster – bottom line is its your responsibility.
How much did it cost?
Copper tubes were £80 for 5 x 3m lengths of 28mm
Couplers were £7
End caps were £6
Crystals for 10 were £20 including shipping
Wood was £20
Bucket was £5
Aluminium shavings were free!
Resin for 7.5kg was £40
We had to buy the 28mm and 32mm drill bits – they were £8.50 each
You don’t need to the maths to work out it was around £200 – quite a saving since some places are charging £250-400 for a 6 foot Chembuster!
So what are you waiting for? Join the thousands who are etheric warriors!
So long Chemtrails, hello blue skies !
Hi, I live in London, I am looking to get aluminium /metal shavings to make orgones (haven’t tried any yet); can you tell me where you get yours from?
Many thanks & best wishes
alice
Hi Alice, I have emailed you the info. For others interested you can look up door makers for aluminium and upvc on the web, or yellow pages, or look for alumiuium suppliers. We got ours from a local door making company who let us have the shavings for free. Good luck people and keep gifting these bad DOR sights
Hi.
Don’t you need to re-charge the crystals from time to time ? I remember I have read somewhere that the cristals are to be recharged in water from time to time.
Hi George,
We’ve heard that before as well, however it would be very difficult to recharge the crystals as they are stuck in the copper pipes which are buried in the resin. We placed our CB in the ground last year which will help to recharge them.
I live in Santa Rosa , California and would like to know where to find the crystals used in the CB.
Hi Mike,
We used eBay for the crystals – a guy in China did us a deal on the crystals and cut them as double terminated.
Hi,
Thankyou for taking the time to leave such detailed & helpful instructions. My question is, where does it say you have to use a bucket with straight sides? Why can’t you use a bucket with tapered sides? I have all the parts for the chembuster, just waiting to read all the available instructions until I build it.
Thankyou,
John
Hi John,
Glad you like the instructions – we found so many in the US but none in the UK so it was a learning curve to make the best one we could. A straight sided bucket is much more stable than a tapered one especially when your chembuster is 6ft tall. If you are planning on burying it in the ground up the top 1 inch of the the resin, then it doesn’t matter which one you use but if you are going to leave it free-standing, a straight one is the best option. If you have a local home-brew shop, you should be able to pick one up – maybe eBay or a similar place.
Thanks and let us know how you get on,
Mark & Denise.
Hi
Having watched the skies overhead being sprayed this morning, I am seriously considering purchasing a kit to make a CB. I watched the video ‘What in the world are they spraying’ the other day, the answer to which seems to be a cocktail of chemicals including aluminium and barium which are contaminating and gradually sterilizing the soil. My question is, if the CBs disperse the clouds, where do the chemicals go? Does the orgonite make them go away, or do they fall to earth somewhere else?
Likely fall to earth elsewhere…
Does anyone know if iron filings can be substituted for aluminum filings? Or, can cement be substituted for the plastic resin?
Yes any metal filings can be used – we used aluminum for weight reasons. Likewise, while the directions we followed was for resin, we don’t see a problem using cement – using resin was again for weight reasons in case you need to move the chembuster around.
Thanks for the detailed instructions, I too use the metric system, so it does help a lot when searching for instructions on how to build them.
About the cb, well should we leave it “on” (assembled and outside) at all times? The reason I ask is because I frequently travel to a place that i like a lot, but I don’t live there, and lately there has been way too many trails which I’ve been photographing and they DO NOT come from a plane, at least we cannot see one even using binoculars.
I have seen they before with whatever could be regarded as a plane, but lately the trails start from one point in the sky and shortly after, they stop, and there are absolutely no traces of any aircraft whatsoever, even today I photographed a short one without planes in sight, nothing.
But my question is related to whether or not leave it outside for days in a row with no supervision. I would really appeciate if you could give a light on this subject as it it the only info I need to start building mine.
If you are interested to see the pics you can email me and I’ll send you.
Thanks a lot! Great site!
Hi Mia – thanks for kind words and comments. We leave our CB outside all the time so its not a problem – we only cover hours when its raining else the rain may enter the tubes and freeze, shattering the crystals – if in doubt, it might be worth covering it if you are away during this time.
We have noticed a number of chemtrails appearing and they seem to be blown by the high altitude winds after being sprayed elsewhere. If they are just appearing, then that is worthy of further investigation. Its amazing how the Met Office in the UK reported climate change and water vapour in the same breath and asked all of us to report the ‘contrails’. Strangely for 3 glorious days of sunshine, there weren’t any chemtrails – strange eh? We’re definitely interested in the photos – just send them through !
Hi, what do you think about the pipes being left open or closed. Obviously, if they can be used indoors just as effectively then why can’t a cover be put on the pipes permanently to keep the rain out when left outside?
Great instructions, thanks for your help.
John
Hi John,
Thanks for the comments – glad to be of help. Due to the nature of the CB, we wouldn’t use them inside. We cover ours during rain/snow with a clear bucket but I have been on the lookout for a clear plastic caps which we’ve been told will be perfectly fine – at least the internals of the pipes will be kept dry. Let us know if you find any, and likewise.
Hi,
Thanks for the help, I have been drawn to using glasses over each copper tube but I have since realised that the bottles of olives you can buy in Lidls are very slim & just long enough to place over each tube. I’m gonna do this with mine & just leave it like that permanently.
Hi John,
What a fantastic idea – I found some old glass bottles for dried herbs from Asda – they fit perfectly over the 22mm copper tubes.
Just to add – you can report your chemtrails during a study by the Met Office in the UK :
Met Office climate survey: how to get involved
http://www.telegraph.co.uk/topics/weather/8357519/Met-Office-climate-survey-how-to-get-involved.html
Climate Survey
http://www.opalexplorenature.org/climatesurvey
Hello all,
A cb can not be constructed out of cement. That would be like a rock on the bottom. The idea is to have a 50/50 ratio of resin/metal. This is 50/50 organic/non-organic material. The quartz crystal purifies and amplifies the orgone generator. W/out quartz the cb base will accumulate DOR, and so will concrete.
Have fun!
olá pessoal,em pouco tempo eu vou fazer um chembuster,já tenho as barras de cobre!!!
This can’t possibly work. You need oxygen-free copper tubes, and the stuff you get at an ordinary plumbing supply isn’t oxygen-free.